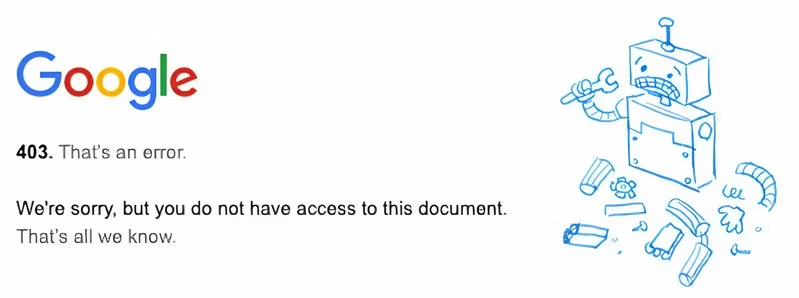
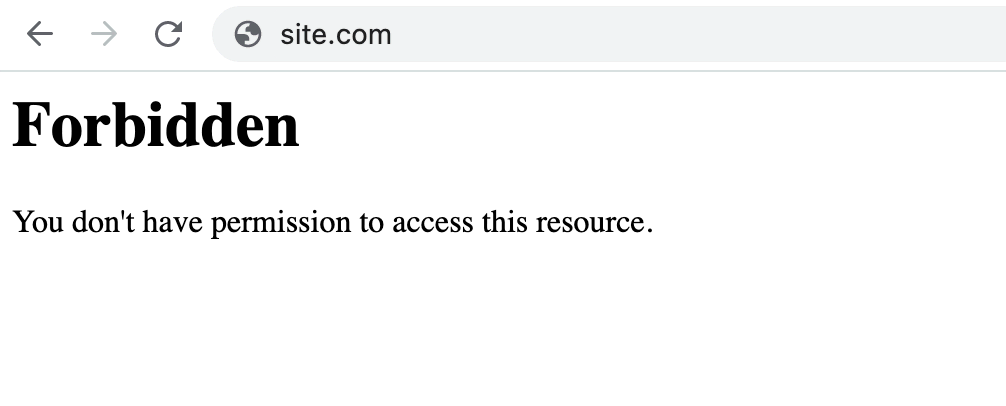
A 403 Forbidden error is an HTTP status code indicating that the server understands the request but refuses to authorize it due to permission issues. This error often arises from client-side misconfigurations.

This error can negatively impact your website’s user experience and increase bounce rates. However, with our guidance, you should be able to fix it quickly.
In this beginner-friendly guide, we’ll explain everything you need to know about this error code, including its causes and 12 effective ways to resolve it.
What Is the 403 Forbidden Error?

The 403 Forbidden error usually happens due to incorrect settings for specific files or folders, which restrict access. You can typically fix this by adjusting these settings to allow the proper permissions.
| Error code | 403 Forbidden Error |
| Error type | Client-side error |
| Error variations | Forbidden: You don’t have permission to access [directory] on this server HTTP Error 403 – Forbidden Error 403 – Forbidden 403 Forbidden request forbidden by administrative rules 403 Forbidden Access Denied – You don’t have permission to access Error 403 HTTP 403 Forbidden |
| Error causes | Access misconfiguration Corrupt .htaccess file Missing index page Broken WordPress plugin Wrong IP address Malware infection New web page link Empty website directory |
What Causes the 403 Forbidden Error?
Here are some common reasons that can trigger a 403 Forbidden error:
- Misconfigured File and Folder Permissions: Users might not have the necessary permissions to access certain files or parts of a website.
- Corrupt .htaccess File: Misconfigurations or malware can corrupt the .htaccess file.
- Missing Index Page: The default homepage template, such as index.html or index.php, is missing from the website’s directory.
- Incompatible WordPress Plugin: A plugin might conflict with another plugin or be incorrectly configured.
- Incorrect IP Address: The domain name points to the wrong IP address, blocking access.
- Malware Scan: Security measures on your website might limit access to specific resources to prevent malicious attacks.
- New Web Page Link: The webpage link has been recently updated, causing a mismatch with the cached version.
- Empty Website Directory: The URL is trying to access a directory instead of a specific file.
How to Fix the 403 Forbidden Error
Encountering a 403 Forbidden error on your web pages can be resolved effectively with these 12 strategies. These methods will ensure your website remains accessible and operates smoothly, minimizing potential downtime.
1. Clear Your Browser Cache and Cookies

Browser caches speed up website loading by storing versions of visited pages. However, if a web page’s link changes, it can cause a mismatch with the cached version and trigger a 403 error. Similarly, browser cookies, which remember user preferences and details, can also contribute to this error, especially on frequently logged-in websites.
To clear cache and cookies in Google Chrome (similar steps apply to Firefox and Safari):
- Click on the three-dot icon in the top right corner and select Settings.
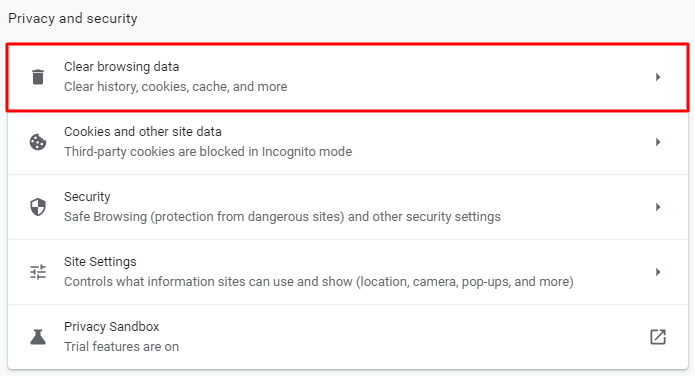
- Navigate to Privacy and security → Clear browsing data.
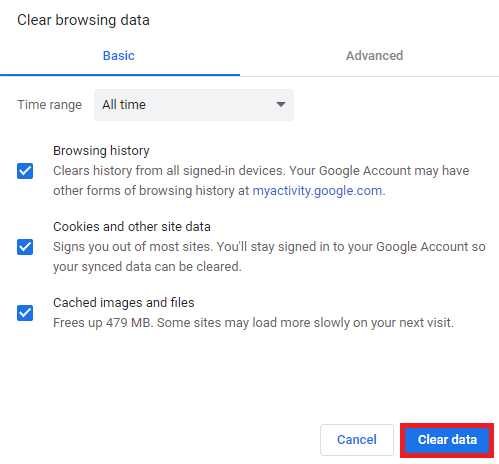
- Choose the time range (select All time for comprehensive clearing) and check Cookies and other site data and Cached images and files.
- Click Clear data to remove them.

After clearing cache and cookies, try accessing the problematic website again. This method can also help resolve other HTTP errors, such as the 400 Bad Request.
2. Disable VPN Temporarily
A virtual private network (VPN) can sometimes trigger a 403 Forbidden error on websites that restrict access from VPN servers due to security or regional restrictions.
To test if your VPN is causing the issue, temporarily disconnect it and try accessing the web page again. If this resolves the error, consider switching to a different VPN server or contacting your VPN provider for assistance.
3. Disable CDN Temporarily
A content delivery network (CDN) improves website performance by caching and delivering content from nearby servers. However, issues such as file permissions, IP blocking, or misconfigured .htaccess rules can lead to a cached 403 Forbidden error.
If your website uses a CDN, temporarily disabling it can help identify whether the error originates from the original web server or the CDN itself.
Steps to Temporarily Disable CDN: (Applies hostinger & some hosting too)
- Navigate to Performance → CDN in hPanel.
- Locate the CDN status section and click on Disable.
- If disabling the CDN resolves the issue, keep it disabled temporarily and consider reaching out to support for further troubleshooting assistance.
4. Scan for Malware from cpanel
The .htaccess file, located in your website’s root directory (public_html), is crucial for configuring Apache web server settings. It dictates how your site behaves, including access permissions to resources and pages.
Malware can compromise your WordPress site by injecting unauthorized code into the .htaccess file, leading to a 403 Forbidden error.
Users can scan and remove malware from WordPress sites without needing third-party tools. Here’s how you can use it:
- Go to hPanel and navigate to Security → Malware Scanner.
- If no malware is detected, this section will display your hosting plan’s name and the time since the last scan.
- If malware is found, the scanner will detail the malicious files detected in the past 30 days and the actions taken to resolve them.f
This built-in scanner ensures your website remains secure by identifying and eliminating malware, helping prevent issues like the 403 Forbidden error.
For extra security, use a WordPress malware scanner plugin to identify malicious software on your WordPress website. Leading WordPress security plugins like Sucuri and Wordfence provide this feature.
Run a Malware Scan from WordPress website
If you’re encountering a 403 Forbidden error on your WordPress website, malware could be the culprit, particularly if it continues to inject unwanted code into the .htaccess file. Even after initial fixes, this issue may persist.
Here’s how to address it:
- Scan for Malware Using WordPress Security Plugins:
- Install and activate a reputable WordPress security plugin such as Wordfence or Sucuri.
- Run a full scan of your website to detect and remove malware. These plugins offer options to restore or delete infected files once detected.
- Restore from Backup:
- If malware has compromised your site and you have backup files available, restore your website from the backup.
- Ensure you have backups of both files and databases to fully restore your website to a clean state.
By running a thorough malware scan and utilizing backup files, you can effectively mitigate the 403 Forbidden error caused by malware infections on your WordPress site.
If the issue persists even after addressing the infected file, consider creating a new .htaccess file.
5. Assess the .htaccess File for Signs of Corruption
The .htaccess file resides in the root directory of your website.
Using cPanel or Plesk? First, locate the File Manager, navigate to your site’s root directory, and search for the .htaccess file. If you don’t see it, enable the ‘Show Hidden Files (dotfiles)’ option under ‘Settings’ in cPanel.
The .htaccess file manages Apache Web Server settings and is essential for server configuration. While it’s typically present by default, you may need to create a new one if it’s missing or accidentally deleted.
If you suspect the 403 Forbidden error is due to a misconfigured .htaccess file, follow these steps to troubleshoot:
- Right-click on the .htaccess file and select ‘Download’ to create a backup.
- Delete the file.
- Attempt to access your website — if successful, it indicates the file was corrupted.
- To create a new .htaccess file, log into your WordPress dashboard, go to ‘Settings’ → ‘Permalinks’.
- Click ‘Save Changes’ without making any modifications.
Following these steps will generate a fresh .htaccess file for your site. If this doesn’t resolve the issue, proceed to the next troubleshooting method.
6. Reset Permissions for the File and Directory
Incorrect file or folder permissions can often cause HTTP 403 issues on your website.
New files come with default permissions that dictate how they can be read, written, and executed. You can adjust these permissions using an FTP client. Here’s how to proceed:
- Set up an FTP client and connect it to your website.
- After connecting, locate the ‘public_html’ directory.
- Right-click on ‘public_html’, then select ‘File Attributes’ or ‘Permissions’.
To set permissions for directories (folders):
- Enter ‘755’ in the ‘Numeric value’ field.
- Choose ‘Apply to directories only’, then click ‘OK’.
For file permissions (static content):
- Repeat the steps above.
- Enter ‘644’ in the ‘Numeric value’ field.
- Select ‘Apply to files only’, then click ‘OK’.
These numeric values ensure that folders have appropriate permissions for access (‘755’), and files have correct permissions for static content (‘644’). After adjusting permissions, try accessing your website to check if the issue is resolved.
7. Deactivate Plugins for WordPress
If none of the previous methods have resolved your 403 Forbidden error, it’s possible that a faulty or incompatible plugin is causing the issue. Here’s how you can disable plugins to identify the culprit:
- Access your hosting account using FTP or the file manager provided by your hosting service.
- Navigate to the
public_html->wp-contentfolder. - Locate the
pluginsfolder. - Rename the
pluginsfolder to something likeplugins-disabledto deactivate all plugins at once. - Try accessing your website again — if the error disappears, it indicates a plugin was causing the issue.
To identify the specific plugin causing the problem:
- Rename the
plugins-disabledfolder back toplugins. - Within the
pluginsfolder, disable plugins one by one by renaming each plugin folder (e.g., changeplugin-nametoplugin-name-disabled). - After renaming each plugin, check if your site functions normally without the 403 error.
When you identify the problematic plugin:
- Update the plugin to the latest version if available.
- If updating doesn’t resolve the issue, consider removing the plugin.
- If the error persists even after removing the identified plugin, contact your hosting provider for further assistance.
8. Index Page Uploading
Ensure your website’s homepage is named correctly: it should be either ‘index.php’ or ‘index.html’. If it isn’t, you have two options to resolve this issue.
Option 1: Rename your homepage to ‘index.php’ or ‘index.html’. Option 2: If you prefer to keep the current name, upload an index page to your public_html directory and set up a redirect to your current homepage.
Here’s how to proceed:
- Use FTP or your hosting account’s file manager to upload an
index.phporindex.htmlfile to yourpublic_htmldirectory. - Locate the
.htaccessfile in yourpublic_htmldirectory and open it. - Add the following code snippet to redirect the
index.phporindex.htmlfile to your current homepage:
apacheCopy codeRedirect index.html /yourcurrentpage.html
Replace 'yourcurrentpage.html' with the actual name of your current homepage.
Following these steps will ensure that your website’s homepage is correctly named and accessible, resolving potential 403 Forbidden errors related to index page configuration.
9. Check Your A Record
If you’re experiencing a 403 Forbidden error, it could be due to your domain name pointing to an incorrect IP address where you lack permission to view the site’s content. Here’s how to verify and correct this issue:
- Verify Domain Name and IP Address:
- Check that your domain name is correctly pointing to the right IP address. This can be done through your domain registrar’s control panel or DNS management.
- Update Nameservers if Migrated:
- If you recently migrated your website to a new hosting provider but forgot to update your domain’s nameservers, your domain could still be pointing to your previous host. This mismatch can trigger a 403 error when your previous host terminates your account.
To resolve these issues:
- Log in to your domain registrar’s website.
- Navigate to the DNS settings or DNS management section.
- Check the A record (Address record) to ensure it points to the correct IP address of your current hosting provider.
- If you recently migrated hosts, update the nameservers to those provided by your new hosting provider.
By verifying and updating your domain’s A record and nameservers, you can ensure your domain correctly points to your current hosting provider’s server, resolving potential 403 Forbidden errors related to domain and IP address mismatches.
10. Reconfigure Ownership of the File
If you’re encountering a 403 Forbidden error and use VPS or Linux web hosting, improper file ownership might be the cause. Here’s how you can address this issue:
- Assess Ownership Using SSH:
- Connect to your server using SSH.
- Use the following command to check ownership of the file:bashCopy code
ls -l [file name] - You’ll see output similar to:cssCopy code
-rwxrw-rw- 1 [owner] [group] 20 Jul 22 12:00 filename.txt - Pay attention to the
ownerandgroupelements. The username associated with your hosting account should be the correct owner. If it’s different, proceed to the next step.
- Change Ownership Using chown Command:
- Use the
chowncommand in Linux to change ownership:cssCopy codesudo chown [owner][:group] [file name] - Replace
[owner]and[group]with the appropriate username and group name. - For example:bashCopy code
sudo chown myuser:mygroup filename.txt
- Use the
By ensuring correct file ownership, you can resolve potential 403 Forbidden errors caused by improper permissions in VPS or Linux hosting environments.
Conclusion
403 Forbidden errors are not just frustrating; they can significantly impact user experience and hinder website traffic. These errors often stem from file permission issues, but can also be caused by problematic plugins or malware infections.
Understanding the root causes and implications of this error is crucial for website owners. By implementing the eight techniques discussed in this guide, you can effectively troubleshoot and resolve 403 errors, ensuring your website operates smoothly and securely.
It’s important to note that HTTP error codes encompass a range of issues beyond 403 Forbidden, including client- and server-side errors like 404 Not Found and 504 Gateway Timeout.
By familiarizing yourself with these common error codes and their causes, you’ll be better prepared to handle issues promptly. This proactive approach not only improves user experience but also enhances the credibility of your online presence.
Read also:
- 10-Hour Rainfall: Businesses Grounded, House Collapses as Floods Overwhelm Lagos
- Moment Bride Loses Temper on Wedding Day
- Court Declares Edo PDP Governorship Primary Invalid
- Kemi Olunloyo’s son, Rich KJT responds to Iyabo Ojo, talks about his relationship with his mother
- Man Shocked to See Spaghetti Sold in Nylons for N100
- Charly Boy Reacts to Viral Photo of Nyesom Wike in N2m Denim Coat
- Grandma’s Joy as She Moves to the US, Vows Not to Return Home
- Tapswap Postpones Token Allocation Again
- Paul Pogba: I’m Committed to Fighting for My Career
- DJ Chicken Wows Fans in Debut Suit Appearance, Video Sparks Social Media Buzz
- 5 Common Pregnancy Myths Every First-Time Mom Should Know
- Stop ex-minister Diezani from using my name, estranged husband urges court
- Ice Prince Denies Moet Abebe’s Claim of a 12-Year Relationship
- Wizkid’s Baby Mama, Jada P, Responds to Fan’s Question About Marriage Plans
- This Week’s Best Celebrity Pictures on Instagram
- 8 Mind-Blowing Facts About the Ocean
- Mompha Remains Elusive as ₦6 Billion Fraud Case Continues


